This article contains detailed instructions for installing and configuring a local virtualized SharePoint 2013 development environment in the desktop version of VMware Player.
Please note that newer versions of SQL Server are also supported and there may be some naming variations, depending on the configuration of your VM.
Step-by-Step Instructions
- Although you can also use Hyper-V or VirtualBox, VMware Player is used in this example. Download the latest version of VMware Player - VMware Player 6.0.4 (32-bit and 64-bit).
- Run the WMware Player Setup executable and click Next.

- Accept the License Agreement and click Next.

- Accept the default location and click Next.

- Enable Check for product updates on startup (optional) and click Next.

- Enable Help improve VMware Player (optional) and click Next.

- Select the shortcuts you want to create and click Next.

- Wait while the VMware Player is installed.

- When the Setup Wizard completes, click Finish.

Virtual Machine Creation
- Click Create a New Virtual Machine.

- Enter or select the following Easy Install Information:
Setting Value Comments Windows product key MSDN, Evaluation, your organization's EA, etc. Version of Windows to install Windows Server 2008 R2 Enterprise Full name Administrator Password / Confirm 
- Enter the Virtual machine name and Location, then click Next.

- Enter a Maximum disk size of 140 GB and select Split virtual disk into multiple files, then click Next.
 Note
NoteYou can specify a smaller or larger disk size here, but remember you'll need enough to install and run SharePoint, SQL Server and Visual Studio. 
- Uncheck Power on this virtual machine after creation and click Customize Hardware.

- Select Memory from the left pane and enter 5,836 for Memory, then click Close.
Note
You may need to adjust the memory setting depending on the amount of memory available on the host. Essentially, you want to set this as close to the maximum recommended without causing the host to become unresponsive. I have also successfully set this as low as 4,096 for a SharePoint 2013 VM. 
- On the New Virtual Machine Wizard, click Finish.

- Select your new VM from the left pane, then click Play virtual machine.

- You may receive an error related to Intel VT-x being disabled. In my case, I simply enabled the option in my machine's BIOS. Once enabled, simply reboot and run WMware Player again. If you need help with this, click the link at the bottom of the error dialog.

- Click Download and Install to install the VMware Tools for Windows.

- At this point, you simply wait on WMware to perform an Easy Install of Windows Server.

- After the installation is complete, wait while the Windows desktop is created.

Active Directory Installation & Configuration
- In Customize this server of the Initial Configuation Tasks window, click Add Roles. New roles can also be added by clicking Add Roles in the Roles Summary section of the Server Manager.
- Select the Server Roles section from the left pane, check Active Directory Domain Services, then click Next.

- On the Active Directory Domain Service wizard dialog, click Next.

- Click Install on Confirm Installation Selections.

- Click Close this wizard...launch dcpromo.exe from the Installation Results dialog.

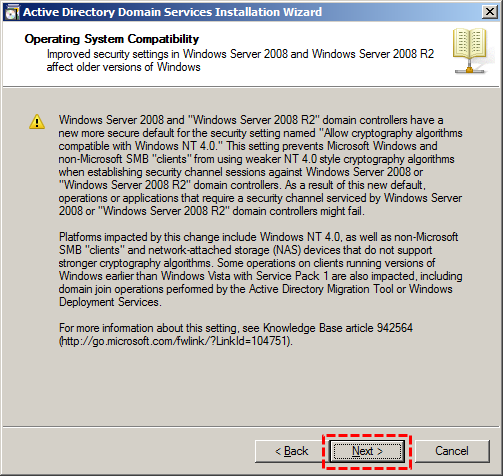
- On the Active Directory Domain Services Installation Wizard, click Next.

- Click Next.
- Select Create a new domain in a new forest and click Next.

- Enter your Fully Qualified Domain Name (FQDN) and click Next.

- Select Windows Server 2008 as the Forest functional level and click Next.

- Check DNS Server for additional options and click Next.

- If you would like to use static IPs, assign them at this time. Otherwise, click Yes. Although dynamic IPs are not recommended, they will most likely work in this scenario, depending on your network configuration.

- If the following dialog is presented, click Yes.

- Accept the default folder locations and click Next.

- Enter and confirm Restore Mode Administrator Password and click Next.

- On the Summary dialog, click Next.

- Wait for the DNS installation to finish.

- Click Finish to close the Installation Wizard.

- Restart the VM by clicking Restart Now.

Service Accounts Creation
- Open the Active Directory Users and Computers application from the Start Menu.

- Right click Users, then the New context menu and User.

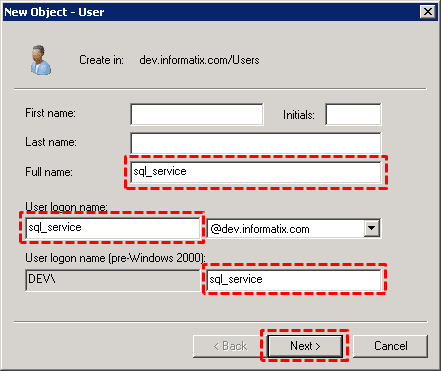
- On the New Object - User dialog, enter sql_service as the Full name, then verify User logon name matches, then click Next.
- Enter and confirm the Password, then uncheck User must change password at next logon and check Password never expires, then click Next.

- Click Finish to create the new account.

- Duplicate the account creation steps to create the following accounts:
Name Purpose sql_service Used to run SQL Server. sp_install Local Admin account used to install SharePoint. sp_farm SharePoint farm account. sp_pool Runs the associated Web Application Pools sp_services Runs the Service Application Pool SQL Server Installation & Configuration
- Run SQL Server setup.exe from your installation media.
- Select the Installation option on the left pane, then click New installation or add features to an existing installation.

- Verify all the Setup Support Rules successfully passed, then click OK. Any failures must be corrected before the installation can continue.

- Enter the product key, then click Next.

- Check I accept the license terms and click Next.

- Click Install to install the Setup Support Files.

- Wait while the Setup Support Files are installed.

- Verify there are no failed rules, then click Next. Any failed rules must be corrected before the installation can continue.

- Select SQL Server Feature Installation, then click Next.

- On the Feature Selection dialog, click Database Engine Services, Management Tools - Basic and Management Tools - Complete, then click Next.

- Verify none of the Installation Rules have failed, then click Next.

- Select Named instance and enter SP2013SQL, then click Next.

- On the Disk Space Requirements, click Next.

- Enter the sql_service account and password for the SQL Service Agent and SQL Server Database Engine services.
- Change the Startup Type of the SQL Server Browser service to Automatic.

- In addition to manually entering the service accounts directly into the Configuration Wizard, you can also select the service account users from Active Directory by selecting Browse, then entering sql_service and clicking Check Names.

- To use Mixed Mode authentication, select the Mixed Mode option and enter the sa password. Windows authentication is the default mode and either will work in this environment.
Click Add the Domain Admins and Local Administrators AD groups, then click Next.

- On the Error Reporting step, click Next.

- Verify the Installation Configuration Rules have passed, then click Next.

- Verify the features to install, then click Next.

- Wait while the SQL Server features are installed.

- Once the setup has completed successfully, click Close.

- Download and install SQL Server 2008 R2 Hotfix - http://support.microsoft.com/kb/2554876.
SharePoint Installation & Configuration
- From Windows Explorer, run splash.hta.

- From the SharePoint Splash window, click Install software prerequisites..

- On the Microsoft SharePoint 2013 Products Preparation Tool wizard, click Next..

- Accept the License Agreement terms, then click Next..

- Wait for the prerequisites to install..

- Click Finish to restart your VM. As additional prerequisites are installed, the VM may need to be rebooted again..

- Click Finish to close the wizard..

- In Windows Explorer, navigate to setup.exe in the root of your SharePoint 2013 installation media. Hold down SHIFT + Right click and click the Run as different user context menu.

- Enter sp_install as the username, then enter the password and click OK.

- On the User Account Control dialog, click Yes.

- Enter your 25 character Product Key, then click Continue.

- Accept the Software License Terms, then click Continue.

- Accept the default folder locations and click Install Now.

- Wait while SharePoint is installed.

- Check the Run the SharePoint Products Configuration Wizard now option, then click Close.

- On the SharePoint Product Configuration Wizard, click Next.

- Click Yes when prompted to reset services as necessary during the configuration.

- Select the Create a new server farm, then click Next.

- On the Specify Configuration Database Settings step, enter the following values, then click Next.
Setting Value Comments Database server SP13\SP2013SQL This is the name of your server and the named SQL Server instance. Database name SharePoint_Config You can change the default name if you have a different naming convention. Username DEV\sp_farm This is your AD Domain and SharePoint Farm account. Password This is the sp_farm account password you created in step 46. 
- Enter and confirm a passphrase, then click Next.

- Check Specify port number and enter 9999 as the port, then click Next.
Note
I typically use 9999 for the Central Admin port, but you can specify a different port. 
- Click Next to apply the configuration settings.

- Wait while SharePoint is configured.

- Click Finish to close the wizard.

- Launch SharePoint 2013 Central Administration from the Windows start menu.
- Click Configuration Wizards from the side menu, then click Launch the Farm Configuration Wizard.

- On the Welcome page, click Start the Wizard.

- Select the Create a new managed account option and enter the User name sp_services and a password.

- Check the Services you want to run on your development farm, then click Next. See the Services Table for details.

Services Table Service Enable Access Services 2010 
Access Services 
App Management Service Business Data Connectivity Service Excel Services Application Lotus Notes Connector Machine Translation Service Managed Metadata Service PerformancePoint Service Application PowerPoint Conversion Service Application Search Service Application Secure Store Service State Service Usage and Health data collection User Profile Service Application Visio Graphics Service Word Automation Services Work Management Service Application Workflow Service Application NoteYou may not require all of these Service in your development environment. Services can be added or removed after the Configuration Wizard is completed in Central Administration. - Wait while the services are configured.

- Enter the site collection Title and Description.
- Select an experience version of 2013 and the Publishing Portal template, then click OK.

- Navigate to http://sp13 (or whatever you named your server) in your browser and check out your new SharePoint 2013 development environment.

Next Steps
- If you plan to develop SharePoint Apps, you will also need to setup an Isolated App Domain.
- For more SharePoint articles and samples, check out the Software Development Outpost.
No comments:
Post a Comment